This article assumes you are using a classic template (without the Layouts features).
By default, a post's comments are only displayed on the post page for that post. You can show them on your main or archive pages as well, of course, but that could get crowded. A better option might be to have a link to click on your main or archive page that will make the comments appear on that page, without having to go to the post page. Something like this:
Example Post
I'm not going to actually type a whole lot here. You can pretend it's long and interesting, though, if that would make you feel better. Just click the comment link here.
# posted by Graham @ 5:15 pm | 2 comments
Comments:
- Dude, you write the best posts. I always love reading your blog.
by Graham's Friend @ 6:16 pm
- I don't know. I think they're pretty bad, really.
by Graham's Enemy @ 7:17 pm
Similar to a previous hack, there are three parts to this feature: CSS, Javascript, and of course, Blogger template tags. So let's go through it step by step.
CSS
This is the simplest part. We need a couple classes that either hide comments or show comments, so you can just paste these two lines into your style sheet:
.commenthidden {display:none}

.commentshown {display:inline}
Your style sheet is usually near the top of your template, between the
tags. If you have your style sheet in a separate file, you'll just add these lines to that file instead of to your template.
Javascript
Add the following code to your template, between the
tags:
 Then choose the color you would like that element to be. You can either click on the color you want or enter the color hex code:
 When you change your blog colors, you can view your changes in the blog preview beneath the color panel. Make sure you save your changes after you have finished selecting the colors for your blog. If you're feeling adventurous you can click "Shuffle blog colors" to randomly shuffle all of the colors already in your blog. If you don't like your changes, you can revert back to your default colors by clicking "Revert to template default."
 The date on each line will link to the page holding that particular comment so it can be read in full. Note that you can change the format of the date (and/or include the time as well) by changing the comment timestamp setting on the Settings | Comments tab in Blogger.
 Under the Blog Readers heading, you'll probably see "Anybody" selected as the default. When you change this to "Only readers I choose," you'll get an Add Readers button.
 Click the Add Readers button and then enter the email address of a person to whom you want to grant access to your blog. To add multiple people, separate their addresses with commas.
 For each address entered, the Google Account associated with that address will be given access to view your blog. If an address is not associated with an account, that person will be sent an invitation email with a link allowing them do one of three things:


 In the upper left corner, there is an option to show or hide the original blog post that the comments relate to. The rest of the left-hand column contains any comments that have already been made. The profile photos of the comment authors may also display, depending on the blog's settings.
 Then select the Show radio button and click Save Settings:
 Once Comments are enabled, several more settings appear:


 What this does is to prevent automated systems from adding comments to your blog, since it takes a human being to read the word and pass this step. If you've ever received a comment that looked like an advertisement or a random link to an unrelated site, then you've encountered comment spam. A lot of this is done automatically by software which can't pass the word verification, so enabling this option is a good way to prevent many such unwanted comments.
 If you click that link you'll be taken to the post page, where the backlinks are all listed beneath the comments. Clicking the triangles next to each link will display a snippet of text from the page linking to you, as well as some author and date information.
 Selecting "Always" will automatically enable comment moderation for all incoming comments on your blog. You may also choose to moderate only older comments by specifying a number of days in the "Only on posts older than" setting. Selecting "Never" will disable comment moderation for this blog.
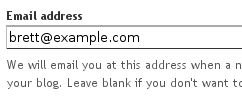 So enable comment moderation from one of the first two options, enter a notification address if desired, save the settings, and wait for your next comment. All incoming comments will now go to a special "Moderate Comments" page, which you can find under the Posting | Moderate comments tab:
 On this page, you will see a list of all the comments that have been created but have not yet been approved or rejected. (This list excludes any comments made by admin members of the blog.) By default, they will be
  and select a connection method:
 Then, enter your settings:


 Republish Index will only republish your blog's index (home) page, and your Atom feed, if you have one:
 Republish Entire Site will do exactly that- republish all your blog's pages, including the index page, archive pages and post pages:
 A status indicator will show how much of your blog has been published :
 Then click Add Authors:
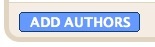 Next, type the email addresses of the people you're inviting to the blog, separating each address with a comma. They'll receive an email with a confirmation link soon. Note that they must have Google Accounts, and if they don't already, they'll be prompted to create one.
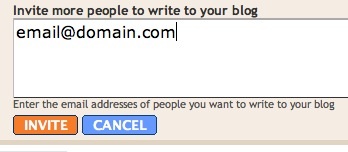 When you're ready to send the invitations, click Invite.